Securing WordPress Websites With WP Guardian
Like any other type of website, WordPress websites can be hacked. Attackers can use known vulnerabilities in WordPress, and also WordPress plugins and themes to steal confidential information, deface WordPress websites, make them install malware on visitors' devices, or to compromise other websites hosted on the same server. WP Guardian offers both free and paid features to help you monitor WordPress websites for vulnerabilities, and also to mitigate them.
In this topic, you will learn how to connect servers hosting WordPress websites to WP Guardian. You will also learn how to evaluate the security of WordPress websites at a glance, and how to mitigate known WordPress vulnerabilities using WP Guardian.
Overview
A successful attack against your WordPress website can cause you financial damage, hurt your reputation, make the website blacklisted by search engines, and more. On servers hosting multiple WordPress websites, even a single vulnerable website may allow an attacker to compromise the entire server.
One of the major attack vectors is known vulnerabilities in WordPress, and also WordPress plugins and themes. WP Guardian was created to help you keep your WordPress websites up to date and secure.
Here's how WP Guardian does it:
- WP Guardian regularly scans all WordPress websites hosted on connected servers. For each website, WP Guardian keeps track of its WordPress core version, and also of the versions of all installed plugins and themes.
- WP Guardian maintains a comprehensive and up-to-date database of all known WordPress vulnerabilities. It gathers information from both Patchstack and WordFence, leading WordPress security services.
- WP Guardian marks every website running a vulnerable WordPress core version, or a vulnerable version of a plugin or theme.
- WP Guardian lists all known WordPress vulnerabilities affecting one or more WordPress websites hosted on connected servers.
- WP Guardian notifies you about events that demand your attention. For example, you can be notified about actively exploited vulnerabilities being used to compromise WordPress websites.
- WP Guardian enables you to secure vulnerable WordPress websites by updating WordPress core on those websites, and also by updating or disabling vulnerable WordPress plugins and themes installed on those websites.
- WP Guardian gives you access to virtual patching (powered by Patchstack), a way of protecting against known unpatched vulnerabilities in both WordPress core and its plugins and themes.
Before you can start securing your WordPress websites, you need to add the server or servers hosting them to WP Guardian.
Connecting Servers to WP Guardian
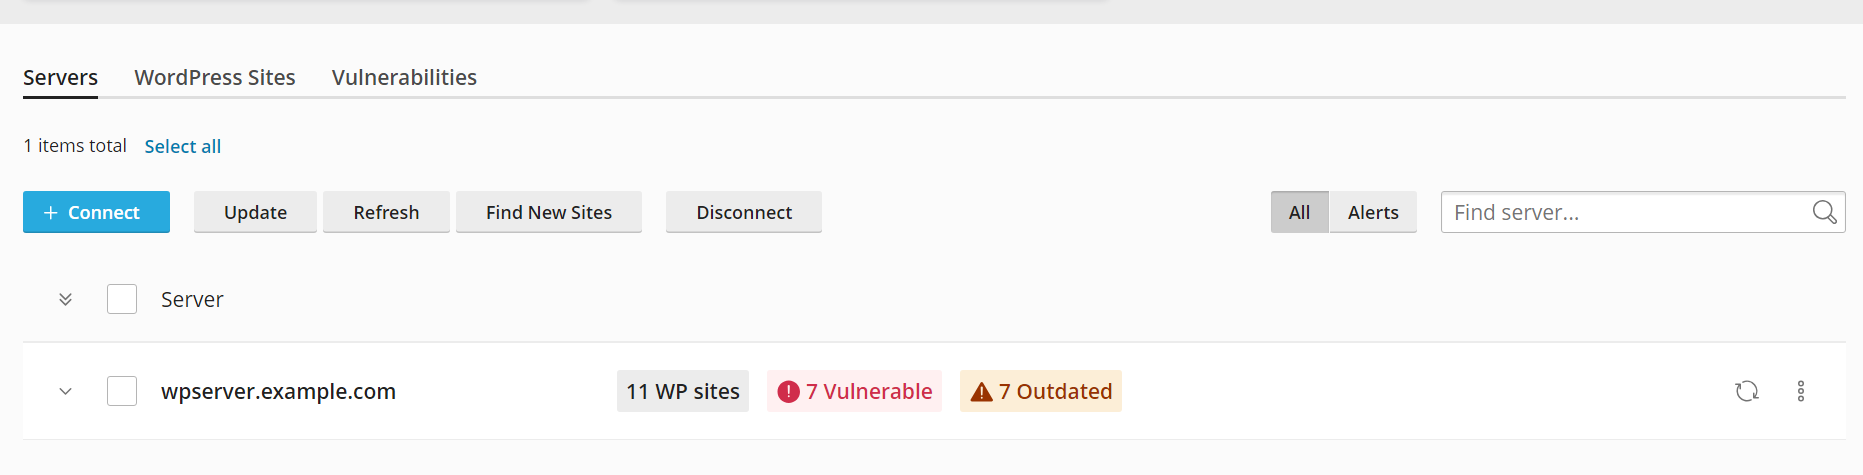
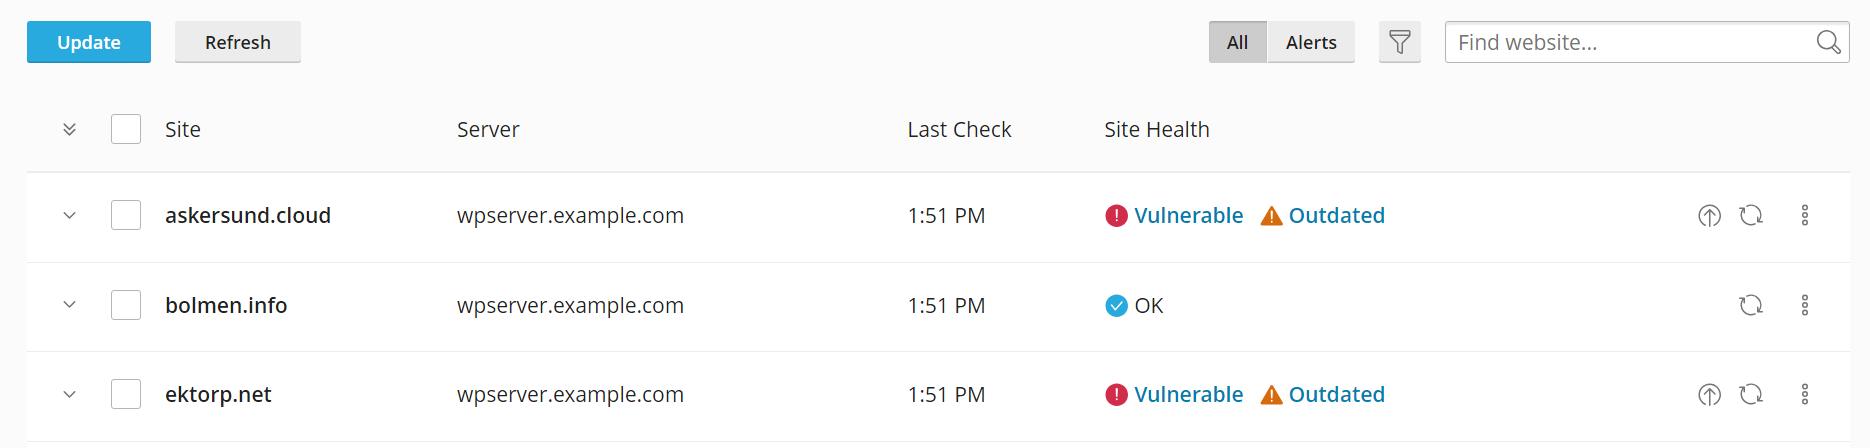
You can connect any number of servers to WP Guardian. When you connect a server to WP Guardian, it is scanned for existing WordPress websites. All WordPress websites hosted on the server appear on the "WordPress Sites" tab.
Prerequisites
-
You can only connect servers running one of the following OS to WP Guardian:
- CentOS 7
- CloudLinux 7
- CloudLinux 8
- CloudLinux 9
- AlmaLinux 8
- AlmaLinux 9
- AlmaLinux 10
- Rocky Linux 8
- Rocky Linux 9
- Rocky Linux 10
- Ubuntu 18.04
- Ubuntu 20.04
- Ubuntu 22.04
- Ubuntu 24.04
- Debian 10
- Debian 11
- Debian 12
- Debian 13
- KUSANAGI 9
-
If your configuration is missing from the list, you can contact us using the LiveChat widget in WP Guardian or by filling the contact form.
-
The TCP port 878 must be open (forwarded in case NAT is used) on servers you want to connect to WP Guardian.
Warning
When you connect a server, make sure that the required TCP port is open on your server:
- Plesk servers: port 8443
- cPanel servers: port 2087
- Other servers: port 878 (opened automatically by the installation script)
For security reasons, we strongly recommend allowing incoming connections to required TCP port only from the following IP addresses:
- 34.254.37.129
- 52.51.23.204
- 52.213.169.7
Connecting a server to WP Guardian:
Note
The procedure below applies to servers with Plesk or cPanel installed. However, for automation, we recommend that you use the specific procedures for Plesk and cPanel.
-
Log in to the WP Guardian website.
-
Click Connect.
-
Click the Copy button to copy the WP Guardian Agent installation script to the clipboard.
-
Log in to the server you want to connect via SSH.
-
Paste the WP Guardian Agent installation script into the console, and then press the "Enter" key.
The installation of the WP Guardian Agent begins on the server. Once the installation is finished, WP Guardian scans the server for WordPress websites. You can find the added server on the "Servers" tab, and all WordPress websites hosted on it on the "WordPress Sites" tab.
Note
Scanning for WordPress websites can cause noticeable increase in CPU and disk I/O consumption. We recommend that you do not connect servers or scan for new WordPress websites during peak hours.
Connecting a Plesk server to WP Guardian:
Note
If you have already generated a token in WP Guardian or Plesk 360 and used the token to connect your Plesk server to Plesk 360, go straight to step 8.
-
Log in to your WP Guardian account.
-
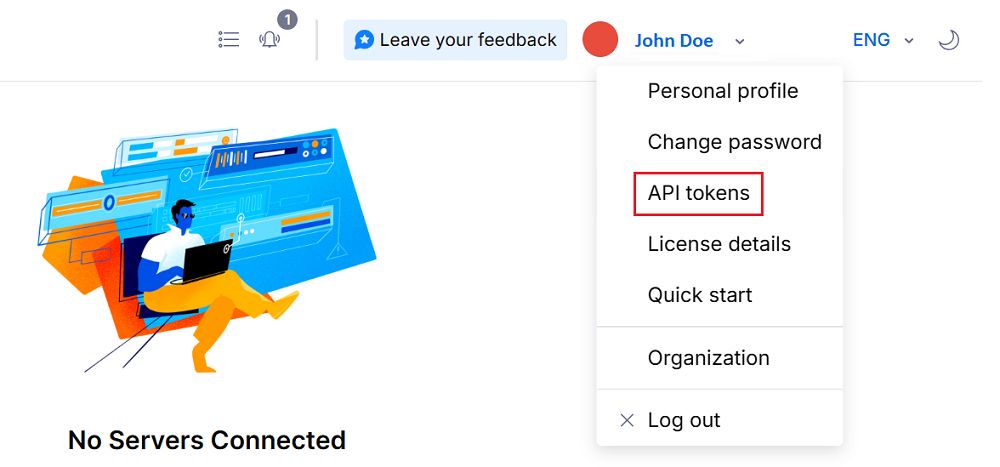
In the top right corner of the screen, click your profile name, and then click API tokens.
-
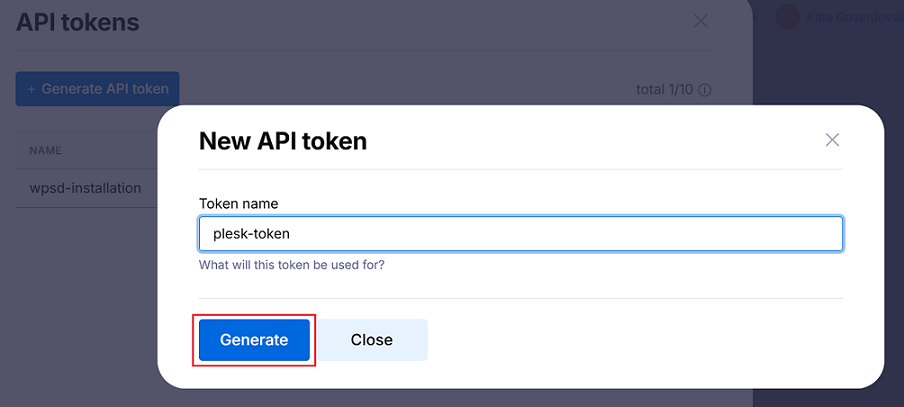
Click Generate API token, give your token a recognizable name, and then click Generate.
-
Copy the token to clipboard, save the token in a safe place, and then click Close.
Note
You can see and copy the token only once when it is generated.
-
Log in to your Plesk server via SSH.
-
Create a file, paste the token copied during step 4, and then save the file.
Note
Make sure the token file has read and write permissions (
chmod 600). -
Connect your Plesk server to Plesk 360 by running the command in the following pattern:
plesk ext platform360 --connect-server -p360-key-file /path/to/file/with/token -
Connect your Plesk server to WP Guardian by running the command in the following pattern:
plesk ext platform360 --wpguardian-setup -p360-key-file /path/to/file/with/token
Congratulations! Your Plesk server is now connected to WP Guardian.
Connecting a cPanel server to WP Guardian:
-
Log in to your WP Guardian account.
-
In the top right corner of the screen, click your profile name, and then click API tokens.
-
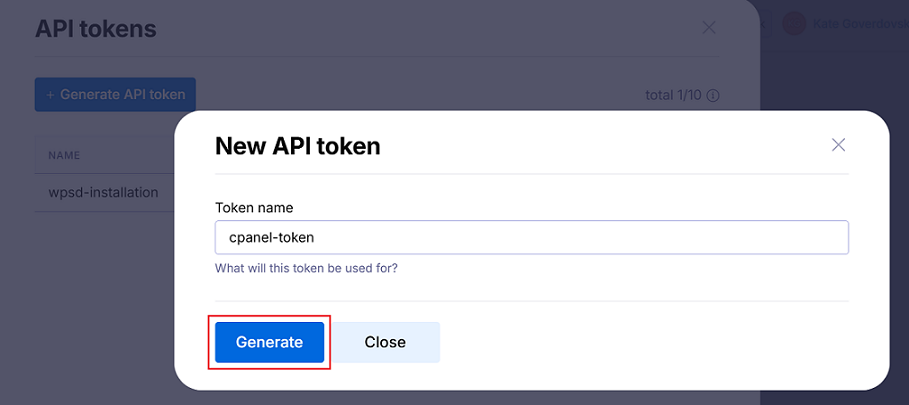
Click Generate API token, give your token a recognizable name, and then click Generate.
-
Copy the token to clipboard, save the token in a safe place, and then click Close.
Note
You can see and copy the token only once when it is generated.
-
Log in to your cPanel server via SSH.
-
Create a file, paste the token copied during step 4, and then save the file.
Note
Make sure the token file has read and write permissions (
chmod 600). -
Download the cPanel plugin installer and connect the cPanel server to Plesk 360 by running the command in the following pattern:
sh <(curl 'https://repo.platform360.io/cpanel-plugin-installer.sh' || wget -O - 'https://repo.platform360.io/cpanel-plugin-installer.sh') && platform360-cpanel-plugin connect-server --api-key-file /path/to/file/with/token -
Connect your cPanel server to WP Guardian by running the command in the following pattern:
platform360-cpanel-plugin wpguardian-setup --api-key-file /path/to/file/with/token
Congratulations! Your cPanel server is now connected to WP Guardian.
Connecting a DigitalOcean server to WP Guardian
You can connect a DigitalOcean server (or as DigitalOcean calls it, a droplet) like any other server using the procedure described above. But the integration between WP Guardian and DigitalOcean streamlines how you buy a WP Guardian license and then connect a droplet. See the procedure below:
-
Log in to your DigitalOcean account.
-
Select a WP Guardian subscription price, select the "I agree to WP Guardian by WebPros's Terms of Service and End User License Agreement" checkbox, and then click Add WP Guardian.
-
Go to SaaS Add-Ons. There you will see the added WP Guardian subscription.
-
To log in to WP Guardian, click "View WP Guardian" link, and then click Continue.
-
You will be asked to enter a 6-digit code sent from WP Guardian. To do so, check the mailbox associated with your DigitalOcean account, find the email with the code, and then copy it to clipboard.
-
Paste the copied code, and then click Continue.
-
Under "1. Copy the following snippet", click Copy.
-
Return to your DigitalOcean account > Droplets, and then click the name of the droplet you want to connect to WP Guardian.
-
Click "Console".
-
In the opened droplet console, paste the snippet copied earlier and wait a while until it is executed.
-
Return to the WP Guardian tab.
Congratulations! You can now see the connected droplet on the "Servers" tab, and all WordPress websites hosted on it on the "WordPress Sites" tab.
Note
You can also watch the video instruction of how to connect a DigitalOcean server to WP Guardian (steps 8-12).
Disconnecting servers from WP Guardian:
-
Log in to the WP Guardian website.
-
Select one or more servers from the list, and then click Disconnect.
-
Confirm the disconnection.
The selected servers and all WordPress websites hosted on it disappear from WP Guardian. The websites remain operational and are not affected in any way by the disconnection. The WP Guardian Agent remains installed and running on the disconnected servers. Learn how to uninstall the WP Guardian Agent manually.
Updating the List of WordPress Websites
When you connect a server to WP Guardian, it is scanned for existing WordPress websites. However, over time, existing WordPress websites may be removed from the server, and new ones may be created. Before you can start monitoring and securing those websites, they need to be added to WP Guardian.
Connected servers are scanned for new WordPress websites every 24 hours. You can also update the list of hosted WordPress websites manually at any time.
Updating the list of hosted WordPress websites:
-
Log in to the WP Guardian website.
-
Select one or more servers from the list, and then click Find New Sites.
All WordPress websites created since the last time the selected servers were scanned are added to WP Guardian. They can be found on the "WordPress Sites" tab.
Detaching WordPress Websites from WP Guardian
Your WP Guardian license comes with a limit on the number of WordPress websites you can secure via WP Guardian. Once the number of websites registered in WP Guardian has reached that limit, any further websites registered in WP Guardian are marked as "unmanaged". Here's what it means:
- You can see unmanaged websites on the "WordPress Sites" tab.
- You can see the vulnerabilities affecting unmanaged websites.
- Unmanaged websites cannot be updated via WP Guardian and enjoy no other benefits and protections offered by WP Guardian.
To reduce the number of registered WordPress websites, you can detach specific websites from WP Guardian. Here's what happens when a WordPress website is detached:
- The website is removed from the WP Guardian interface, and can no longer be monitored, managed, or secured via WP Guardian.
- The website no longer counts against the limits of your WP Guardian license.
- The website is ignored when the server hosting it is scanned for new WordPress websites by WP Guardian.
Note
Detaching a WordPress website from WP Guardian does not remove it from the hosting server, take it offline, or harm it in any other way.
Detaching a WordPress website from WP Guardian:
-
Log in to the WP Guardian website.
-
Go to the "WordPress Sites" tab.
-
Click the
 button corresponding to the website you want detach.
 -
Click Detach, and then click Detach again.
The WordPress website is now detached from WP Guardian.
Note
If you change your mind, you can make a detached WordPress website once again discoverable by WP Guardian. To do so, log in to the server hosting it and remove the .wp-toolkit-ignore file found in the website's root directory. If you do, the next time the server is scanned for existing WordPress websites, the website will be re-added to WP Guardian.
Keeping WordPress Websites Secure
Now that you have connected one or more servers hosting WordPress websites to WP Guardian, it is time to start securing them to protect them from being attacked.
Updating all WordPress Websites Hosted on Specific Servers
The fastest and most straightforward way to update your WordPress websites. Select one or more servers, then update both WordPress core and all installed plugins and themes on all WordPress websites hosted on them to the latest version. However, this way you have no fine control over what updates are installed on what websites.
Updating all WordPress websites hosted on specific servers:
-
Log in to the WP Guardian website.
-
Select one or more servers, and than click Update.
WordPress core, and also all installed plugins and themes will be updated to the latest version on all WordPress websites hosted on the selected servers.
Updating Multiple WordPress Websites
A fast way to update multiple WordPress websites at once. Select one or more websites, then update both WordPress core and all installed plugins and themes on all of them to the latest version. This way, you can update WordPress websites hosted on different servers, and also update certain websites hosted on a server without updating the others. However, you cannot control what updates are installed on the websites.
-
Log in to the WP Guardian website.
-
Go to the "WordPress Sites" tab.
-
Select one or more websites, and then click Update.
WordPress core, and also all installed plugins and themes will be updated to the latest version on the selected WordPress websites.
Updating Individual WordPress Websites
The opposite of the preceding approach, updating WordPress websites individually gives you maximal control over what updates are installed. However, it is the most time-consuming method of all.
Updating an individual WordPress website:
-
Log in to the WP Guardian website.
-
Go to the "WordPress Sites" tab.
-
Click the website you want to update to expand its card.
-
(Optional) Click Update to ... next to "WordPress" to update the WordPress core on the website to the latest version.
-
(Optional) To update all available updates for plugins on the website, click Install plugin updates. To update individual plugins, click # Outdated, select one or more plugins from the list, and then click Update to update the selected plugins to the latest versions.
-
(Optional) To update all available updates for themes on the website, click Install theme updates. To update individual themes, click # Outdated, select one or more themes from the list, and then click Update to update the selected themes to the latest versions.
The WordPress core and/or plugins and themes you selected will be updated to the latest version on the website.
Protecting Against Specific Vulnerabilities
A good way to maximize security while minimizing the risks related to updating is to only update the WordPress core and/or plugins and themes with known vulnerabilities.
Updating all WordPress websites affected by specific vulnerabilities:
-
Log in to the WP Guardian website.
-
Go to the "Vulnerabilities" tab.
Note
The "Vulnerabilities" tab only lists vulnerabilities currently affecting one or more WordPress websites hosted on connected servers, not all known WordPress vulnerabilities.
-
Select one or more vulnerabilities, and than click Update.
Note
The CVSS score (0-10) reflects the severity of the vulnerability. The higher the score, the more serious the potential impact. You can learn more about a vulnerability in the list by clicking the corresponding
 icon, and then clicking Details.
The WordPress core and/or plugins and themes affected by the selected vulnerabilities will be updated to the latest version on all WordPress websites hosted on connected servers.
Protecting Against Actively Exploited Vulnerabilities
When the WordPress core version installed on a website contains a vulnerability that is being actively exploited, such a website is very vulnerable to attacks. Same goes for plugins and themes. We strongly recommend that you update the WordPress core and/or any plugins or themes affected by such vulnerabilities as soon as possible.
Note
When WP Guardian notifies you about a vulnerability that is being actively exploited, it means that one or more attacks on WordPress websites using that vulnerability have been reported. It does not mean that WordPress websites hosted on connected servers are being attacked right now.
Updating all WordPress websites affected by actively exploited vulnerabilities:
-
Log in to the WP Guardian website.
-
Go to the "Vulnerabilities" tab.
Note
The "Vulnerabilities" tab only lists vulnerabilities currently affecting one or more WordPress websites hosted on connected servers, not all known WordPress vulnerabilities.
-
Click the
 button, and then select "Exploited" from the list.
 -
Select one or more actively exploited vulnerabilities, and then click Update.
Note
The CVSS score (0-10) reflects the severity of the vulnerability. The higher the score, the more serious the potential impact. You can learn more about a vulnerability in the list by clicking the corresponding
icon, and then clicking Details.
The WordPress core and/or plugins and themes affected by the selected actively exploited vulnerabilities will be updated to the latest version on all WordPress websites hosted on connected servers.
Enabling backups before updates
Updating a WordPress website may result in undesirable changes or cause it to malfunction. To avoid potential issues when updating hosted websites, you can automatically back up the site before updating it.
When backups before updates are enabled for a WordPress website, every time its core, or any of its installed plugins or themes are updated via WP Guardian, a backup is automatically created before any updates are installed. If there are any issues after updating, the website is automatically restored from the backup, undoing the updates and restoring the website to its pre-update state.
Backups before updates are enabled on a per website basis. As long as backups before updates are enabled for a WordPress website, a backup is created every time it would be updated via WP Guardian. You can enable or disable backups before updates at any time.
Enabling backups before updates for a specific WordPress website:
-
Log in to the WP Guardian website.
-
Go to the "WordPress Sites" tab.
-
Click the website you want to enable backups before updates for to expand its card.
-
Click Update Settings.
-
For "Back Up Before Update", select "Enable backups before updates" from the drop-down list, and then click Save.
Backups before updates are now enabled for the website.
Enabling backups before updates for all WordPress websites hosted on a specific server:
-
Log in to the WP Guardian website.
-
Click the
button corresponding to the server you want to enable backups before updates on, and then click Update settings. -
For "Back Up Before Update", select "Enable backups before updates" from the drop-down list, and then click Save.
Backups before updates are now enabled for all WordPress websites hosted on the server.
Enabling Virtual Patching
Vulnerabilities stem from defects in the WordPress core source code, and also in the source code of plugins and themes. Fixing a vulnerability usually involves correcting such defects in the code, and then issuing an update containing the fix. However, this process is not instantaneous, and a known vulnerability may remain unpatched for weeks or even months.
Virtual patching (powered by Patchstack) is a method of securing WordPress websites against unpatched vulnerabilities. When you enable virtual patching for a WordPress website, a plugin is installed. This plugin works as a web application firewall (WAF) that blocks incoming requests that appear to be targeting a known unpatched vulnerability before they reach the website. Thus, protection against such vulnerabilities is achieved without altering the source code of WordPress or its plugins and themes.
Unlike regular WAFs, this plugin applies a limited set of rules aimed at known unpatched vulnerabilities, and thus has minimal impact on performance. You can enable or disable virtual patching both for specific WordPress websites and on specific servers at any time.
Enabling virtual patching for specific WordPress websites:
-
Log in to the WP Guardian website.
-
Go to the "WordPress Sites" tab.
-
Select the website or websites you want to enable virtual patching for.
-
Click Enable Patching, and then click Enable Patching again.
Virtual patching is now enabled for the selected website(s).
Enabling virtual patching for all WordPress websites hosted on a specific server:
-
Log in to the WP Guardian website.
-
Select the server or servers you want to enable virtual patching on.
-
Click Enable Patching, and then click Enable Patching again.
Virtual patching is now enabled for all WordPress websites hosted on the selected server(s). Virtual patching will also be automatically enabled for every WordPress website created on those servers for as long as virtual patching remains enabled on the server(s).
You can disable virtual patching both for specific WordPress websites and on specific servers. You can disable virtual patching for a specific website even if virtual patching is enabled on the server it is hosted on.
Disabling virtual patching for a specific WordPress website:
-
Log in to the WP Guardian website.
-
Go to the "WordPress Sites" tab.
-
Click the
button corresponding to the website you want to disable virtual patching for, and then click Disable Patching.
Virtual patching is now disabled for the website.
Disabling virtual patching for all WordPress websites hosted on a specific server:
-
Log in to the WP Guardian website.
-
Click the
button corresponding to the server you want to disable virtual patching on, and then click Disable Patching. -
Click Disable Virtual Patching.
Virtual patching is now disabled for all WordPress websites hosted on the server.
Managing Email and UI Notifications
WP Guardian sends you email notifications and also shows notifications in the WP Guardian UI, in a separate pane.
To see these notifications, click the ![]() icon in the upper part of the screen.
icon in the upper part of the screen.
The notifications inform about the following:
- Exploitable vulnerabilities. WP Guardian will notify you when such a vulnerability is found on your websites managed by it.
- Events related to licenses. WP Guardian will notify you when your trial license becomes active, expires, or becomes terminated.
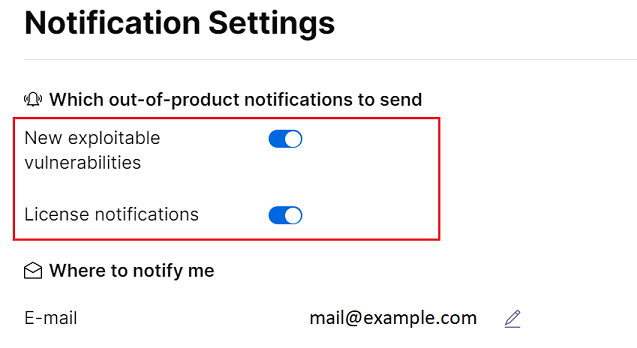
You can choose which notifications to receive (on exploitable vulnerabilities, on licenses, or on both). You can also change the email address to receve notifications to. By default, WP Guardian chooses the email address you have registered with.
Selecting which notifications to receive:
- Log in to the WP Guardian website.
- Click the
 icon in the upper part of the screen, and then click "Settings".
 - In the "Notification Settings" pane, turn on which notifications to receive: on exploitable vulnerabilities, on licenses, or on both.
Changing the email address to receive notifications to:
- Log in to the WP Guardian website.
- Click the icon in the upper part of the screen, and then click "Settings".
- In the "Notification Settings" pane, click the
 icon next to the current email address you receive notification to.
 - Type a new email adress to receive notification to, and then click Send e-mail.